Gauge
Gauge


Numel (20%)


Primeape (20%)

Mankey (20%)

1 (Pattern 2)
4 (Pattern 3)
2 (Pattern 4)
Pelipper (5%)

Quagsire (5%)

Quagsire (20%)


4 (Pattern 4)

Mudkip (20%)

Pelipper (20%)

2 (Pattern 4)
Sealeo (20%)

Buizel (30%)

Stunky (20%)
Check out WarriorGallade's post on this Mission for more specific tips.
| Rank | AP | Slates |
|---|---|---|
| S | 80 | Togetic (90%) Feraligatr (10%) |
| A | 55 | Vulpix (100%) |
| B | 40 | N/A |
| C | 30 | N/A |
Glaceon is inaccessible when playing solo.
| Pokémon | Quantity | Group | Friendship Gauge |
Agitated Gauge |
AP | Slates | |
|---|---|---|---|---|---|---|---|
|
|
Glaceon | 1 (4+ players) | Ice | 7,280 | N/A | 13 | Glaceon (100%) |
|
|
Camerupt | 2 (Patterns 1 & 4) | Fire | 2,210 | N/A | 6 | Camerupt (80%) Numel (20%) |
|
|
Vulpix | 10 | Fire | 1,300 | N/A | 4 | N/A |
|
|
Mankey | 1 (Patterns 2 & 4) | Fighting | 988 | N/A | 4 | Mankey (80%) Primeape (20%) |
|
|
Primeape | 1 (Patterns 2 & 4) | Fighting | 1,720 | 206 | 7 | Primeape (80%) Mankey (20%) |
|
|
Kabutops | 5 (Pattern 1) 1 (Pattern 2) 4 (Pattern 3) 2 (Pattern 4) |
Rock | 2,990 | N/A | 8 | Kabutops (95%) Pelipper (5%) |
|
|
Wooper | 1 | Water | 1,040 | N/A | 3 | Wooper (95%) Quagsire (5%) |
|
|
Quagsire | 2 | Water | 2,028 | N/A | 6 | Wooper (80%) Quagsire (20%) |
|
|
Dunsparce | 3 (Patterns 1 & 3) | Normal | 780 | N/A | 3 | Dunsparce (100%) |
|
|
Sneasel | 1 (Pattern 2) 4 (Pattern 4) |
Dark | 1,300 | N/A | 4 | Sneasel (100%) |
|
|
Marshtomp | 2 (Pattern 1) | Water | 1,456 | N/A | 5 | Marshtomp (80%) Mudkip (20%) |
|
|
Wingull | 2 (Pattern 3) | Flying | 1,300 | N/A | 4 | Wingull (80%) Pelipper (20%) |
|
|
Spheal | 5 (Pattern 2) 2 (Pattern 4) |
Ice | 1,300 | N/A | 4 | Spheal (80%) Sealeo (20%) |
|
|
Floatzel | 1 (Patterns 2 & 3) | Water | 1,820 | N/A | 5 | Floatzel (70%) Buizel (30%) |
|
|
Skuntank | 2 (Patterns 2 & 3) | Poison | 2,132 | N/A | 6 | Skuntank (80%) Stunky (20%) |
| Pokémon | Group | Friendship Gauge |
Agitated Gauge |
AP | |
|---|---|---|---|---|---|
 |
Feraligatr | Water | 7,670 | 1,134 | 13 |
Text of this section & map image are taken from WarriorGallade's post on the subject, supplemented with information from the official Prima guide book, and condensed/reorganized slightly. Used with permission.
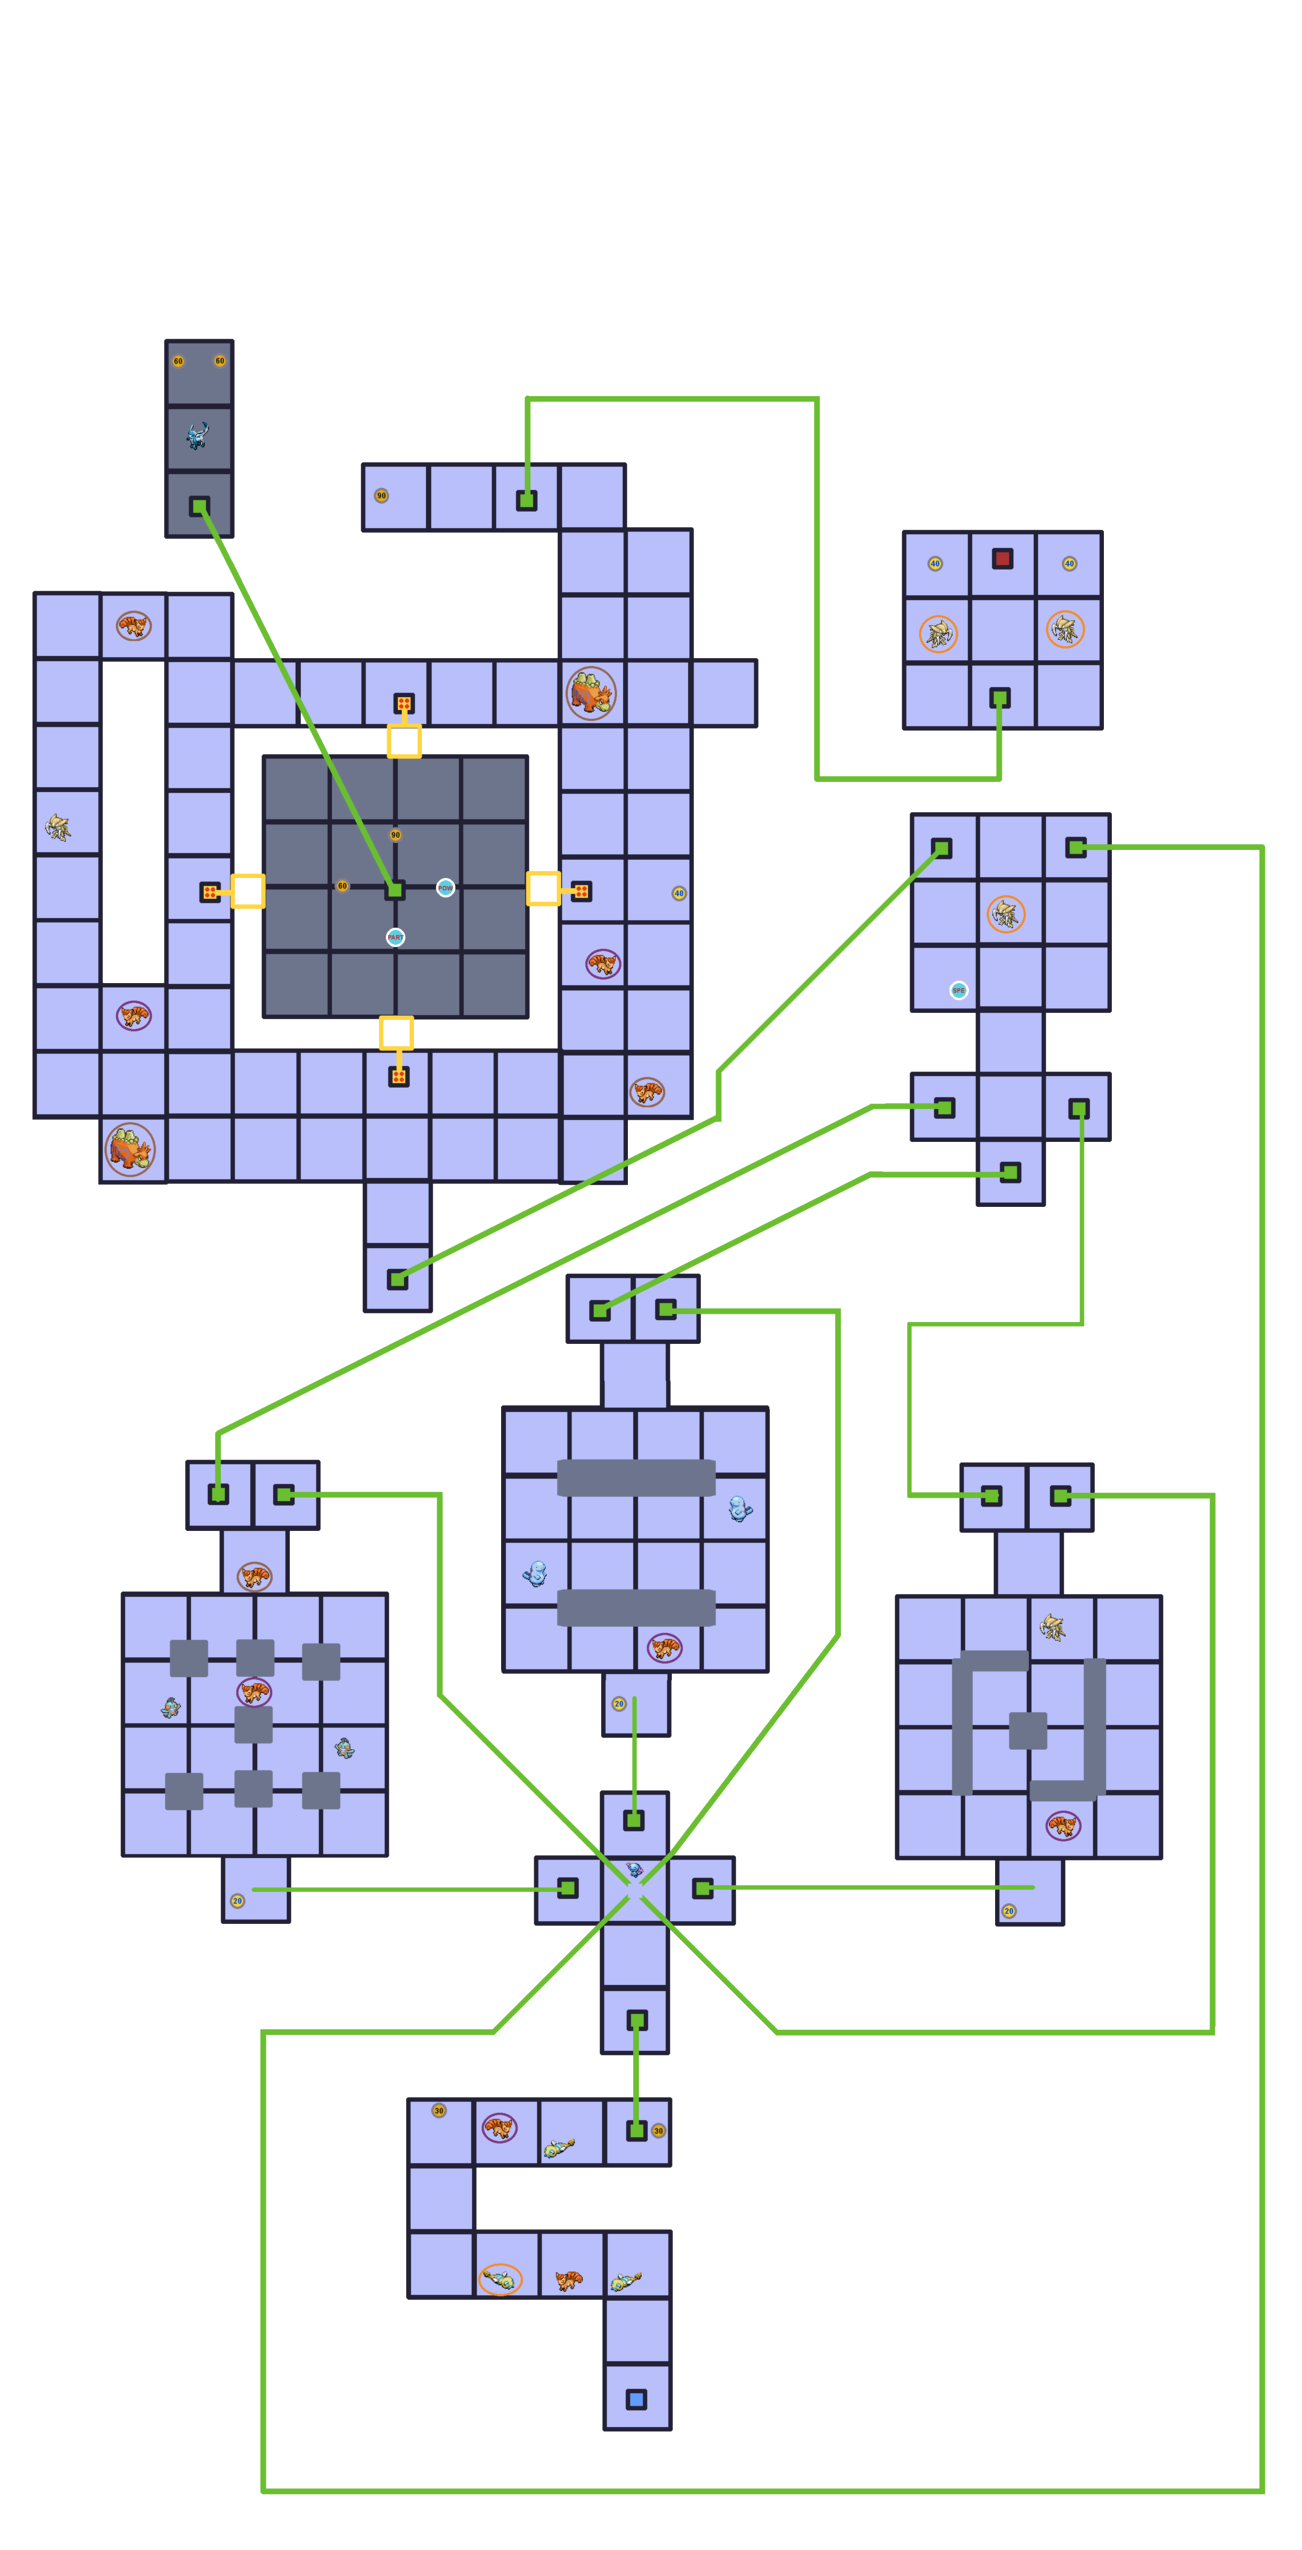
This Mission contains four different patterns of wild Pokémon that can appear. Click a thumbnail below to view that pattern's map.
Legend:
 Icons like this (darker) give the player extra seconds, determined by the number.
 Icons like this (lighter) restore the player's Styler by the specified number of energy.
 Icons like this (SPE) increase the player's movement speed.
This is a notoriously difficult mission. It is your first exposure to one-way teleporters. The way they are arranged in this mission, backtracking is always possible, but it costs time. AP yields are generous and useful for practicing harder capture patterns (e.g., Vulpix gives 4 AP despite an easy ~20-25s capture). The mission goal requires saving specifically frightened Vulpix: agitated/normal Vulpix don't count (and won't drop Slates). Several obstacle-course-style rooms require navigating past high-value but time-costly Pokémon (Kabutops: 8 AP, Quagsire: 7 AP) to reach roaming Vulpix, which move at a speed close to the player's and require corner-cutting (much easier with a speed powerup: roughly 8 seconds with one vs. up to 45 without one).
The optimal route requires the player to get the Speed powerup first, since catching fleeing Vulpix is difficult or impossible without it. From the 3-route branch, go right, then up (ignoring Vulpix and Kabutops), into the left teleporter (left is always forward and right is always backward in these branch rooms). In the 5-teleporter room, go up along the left side to a chest for a speed powerup, then return to capture Vulpix from the three bottom chambers: right chamber first (easiest, since Vulpix's path is now known), then central (watch for two time-consuming Quagsire), then left (approach the scared Vulpix from the top-right only). Return to the 5-teleporter room and take the top-left teleporter into a huge room. Head left past Camerupt/Skuntank to catch a Vulpix (though watch for Pokémon that might interrupt the chase), then back and right to grab another via a careful diagonal approach (avoiding a chase). Continue north, dodge more obstacle Pokémon, and reach the boss room.
Pattern IdentificationSome Pokémon are only found in certain patterns, so grinding for their Slates is dependent on getting the correct pattern.
Unlike other bosses, Feraligatr doesn't agitate at 50% Friendship Gauge, but rather around 90% gauge. It recovers gauge energy extremely fast if left alone. While agitated, its attacks will target your Pokémon sent out for Assists, so be careful where you place your Pokémon.
Expect to struggle and fail repeatedly. This is likely your first real roadblock. Multiplayer unlocks a 4-person door with useful powerups and early Glaceon access, making this much easier to complete if playing co-op. If playing alone, don't miss the 90-second time extension - its location varies depending on pattern, so pay attention! With good Vulpix routing, S-rank starts to become realistic around level 40-45.
The game itself suggests inflicting Tired status to stop Feraligatr's fast regeneration. Drapion can do this, but its long recharge time means the status often wears off before you can reapply it if Feraligatr lands a hit. Electric and Grass options generally lack the range, power, or AP-efficiency to be practical here; the exceptions are Sceptile, Carnivine, and Tangrowth, but these require a heavy AP investment. Ultimately, despite its bad type matchup, Piplup remains the best pick. Its quick recharge lets you reapply Tired frequently, preventing Feraligatr's regeneration, and its speed boost helps with Vulpix captures too. Chingling - which requires low AP investment and has a low recharge time - is a flexible, if weak, alternative worth considering.