Gauge
Gauge


4 (Pattern 2)
1 (Pattern 3)

1 (Patterns 3 & 4)
Ursaring (20%)

Teddiursa (20%)

2 (Patterns 2 & 4)
4 (Pattern 3)
Aron (20%)

Aggron (20%)

Camerupt (20%)

3 (Patterns 3 & 4)
Bastiodon (20%)


Check out WarriorGallade's post on this Mission for more specific tips.
| Rank | AP | Slates |
|---|---|---|
| S | 40 | Bastiodon (90%) Probopass (10%) |
| A | 30 | Aron (100%) |
| B | 20 | N/A |
| C | 16 | N/A |
| Pokémon | Quantity | Group | Friendship Gauge |
Agitated Gauge |
AP | Slates | |
|---|---|---|---|---|---|---|---|
|
|
Delibird | 1 (Pattern 3) | Ice | 700 | N/A | 20 | Delibird (100%) |
|
|
Eevee | 4 (Pattern 4) | Normal | 420 | N/A | 1 | Eevee (100%) |
|
|
Shuckle | 5 (Pattern 1) 4 (Pattern 2) 1 (Pattern 3) |
Rock | 3,360 | N/A | 3 | Shuckle (100%) |
|
|
Teddiursa | 5 (Patterns 1 & 2) 1 (Patterns 3 & 4) |
Normal | 364 | N/A | 1 | Teddiursa (80%) Ursaring (20%) |
|
|
Ursaring | 3 (Pattern 2) | Normal | 1,596 | N/A | 4 | Ursaring (80%) Teddiursa (20%) |
|
|
Lairon | 5 (Pattern 1) 2 (Patterns 2 & 4) 4 (Pattern 3) |
Steel | 1,680 | N/A | 3 | Lairon (80%) Aron (20%) |
|
|
Aggron | 5 | Steel | 4,200 | 202 | 5 | Lairon (80%) Aggron (20%) |
|
|
Numel | 6 (Pattern 4) | Fire | 588 | N/A | 1 | Numel (80%) Camerupt (20%) |
|
|
Shieldon | 1 (Pattern 2) 3 (Patterns 3 & 4) |
Steel | 1,330 | N/A | 2 | Shieldon (80%) Bastiodon (20%) |
|
|
Bastiodon | 4 | Steel | 2,520 | 121 | 4 | N/A |
|
|
Munchlax | 5 (Pattern 3) | Normal | 476 | N/A | 1 | Munchlax (100%) |
| Pokémon | Group | Friendship Gauge |
Agitated Gauge |
AP | |
|---|---|---|---|---|---|
 |
Probopass | Rock | 6,000 | 467 | 6 |
Text of this section & map image are taken from WarriorGallade's post on the subject, supplemented with information from the official Prima guide book, and condensed/reorganized slightly. Used with permission.
This Mission contains four different patterns of wild Pokémon that can appear. Click a thumbnail below to view that pattern's map.
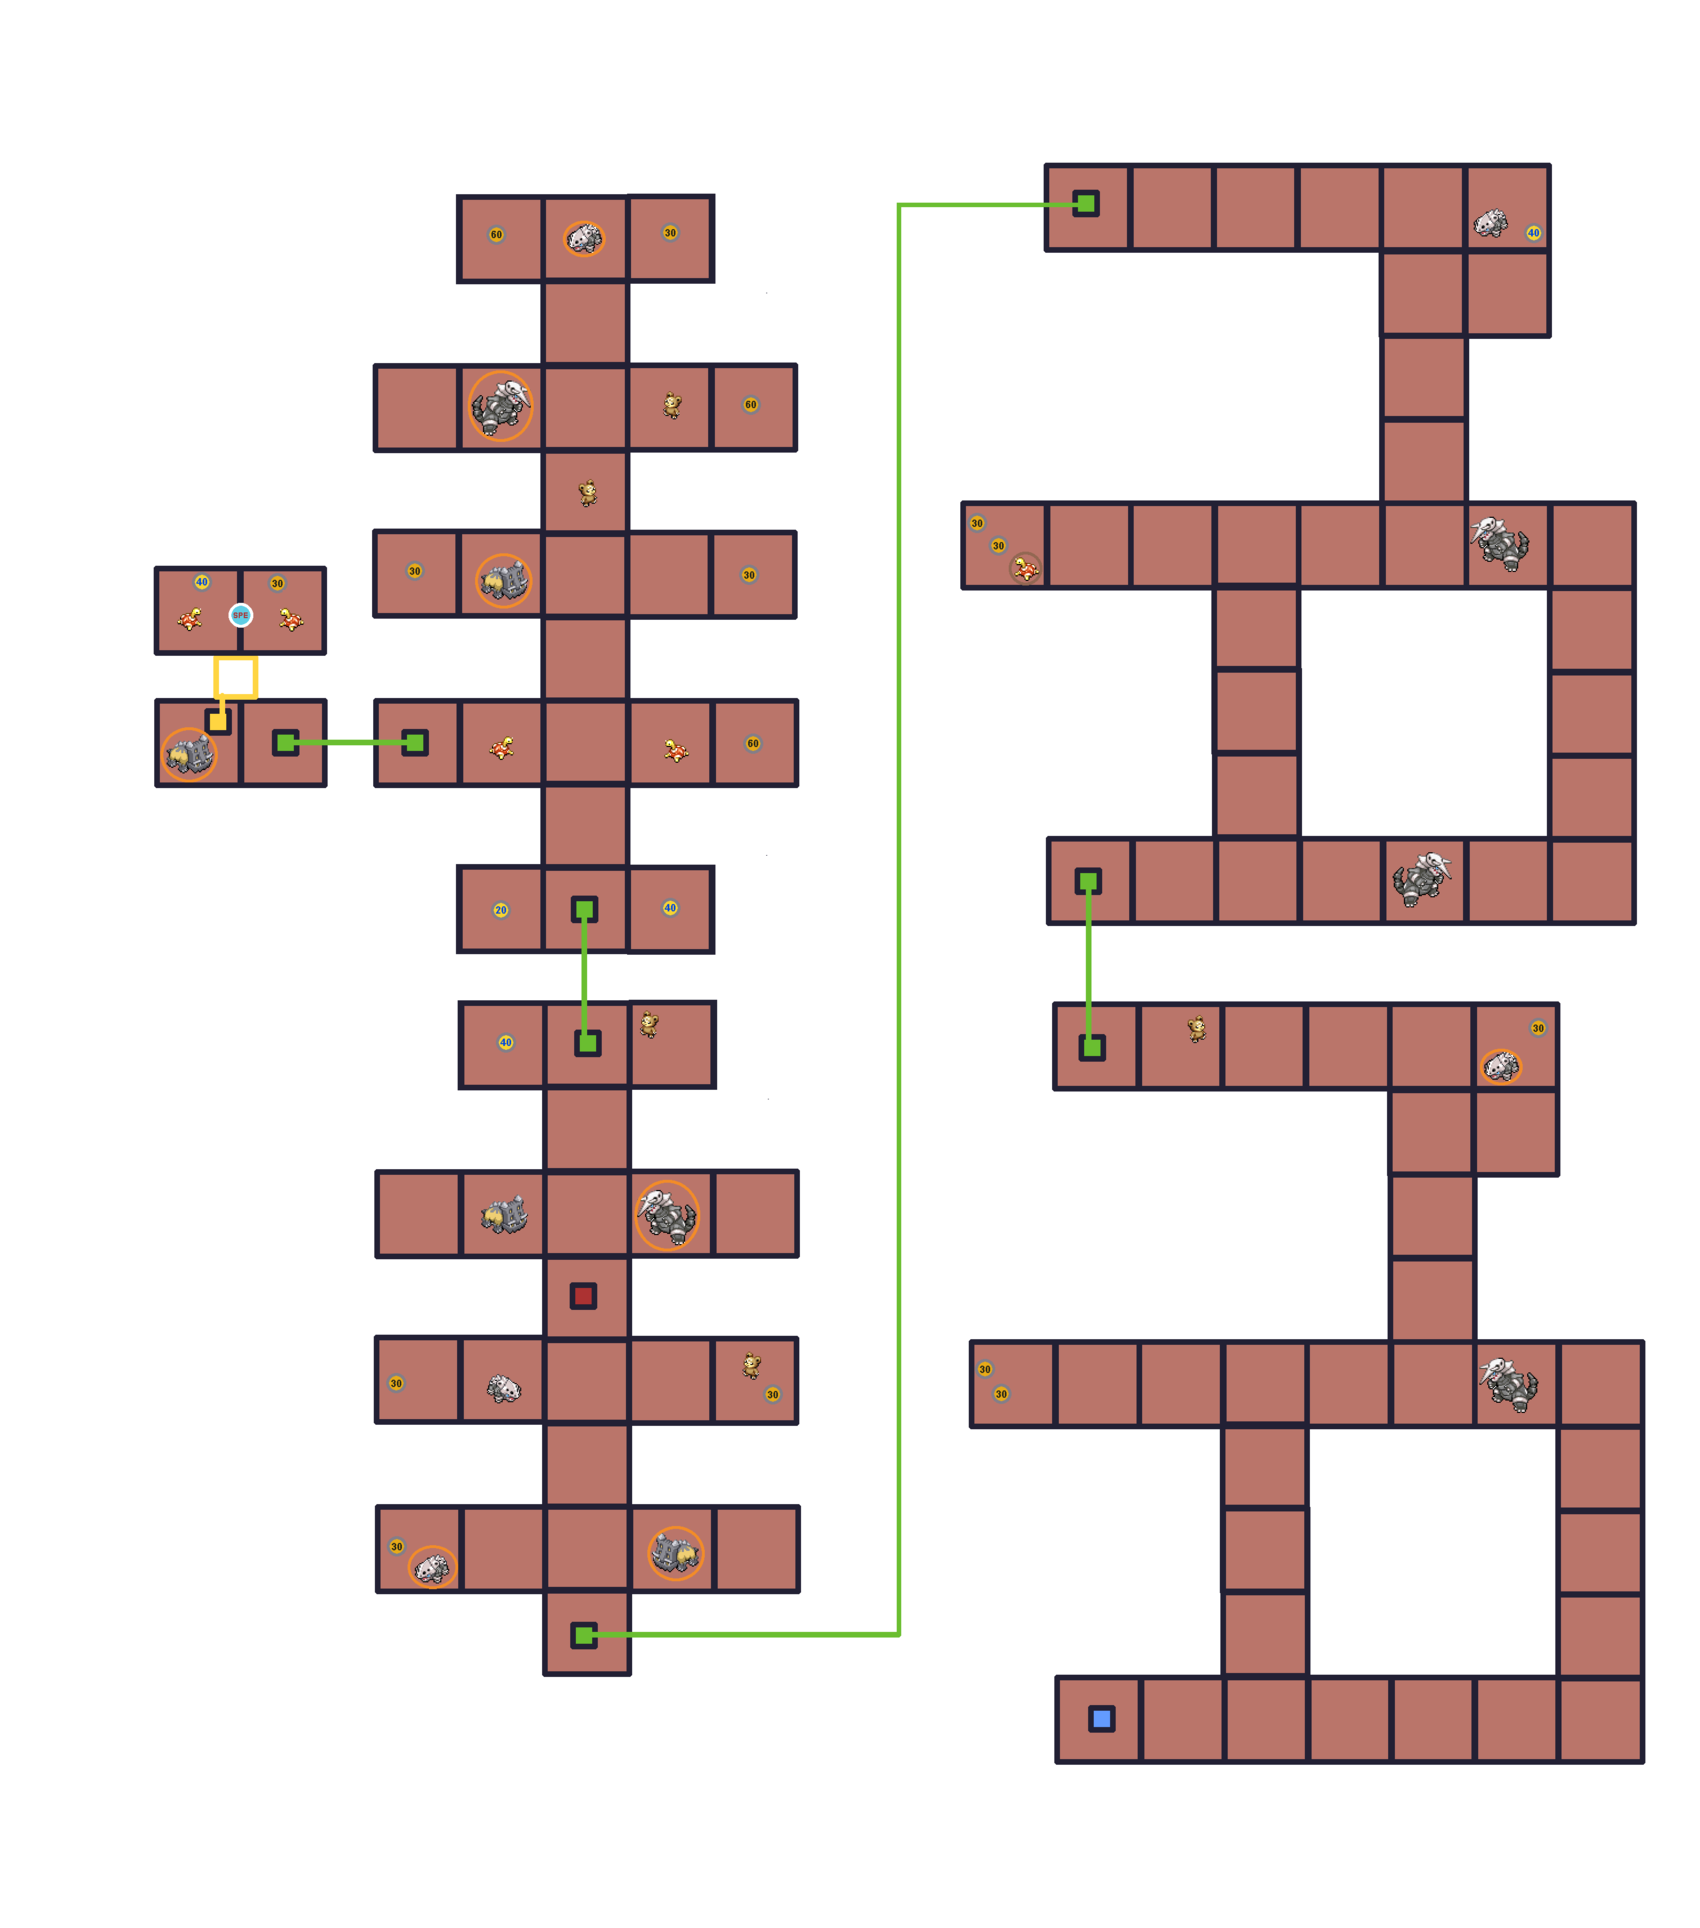
Legend:
 Icons like this (darker) give the player extra seconds, determined by the number.
 Icons like this (lighter) restore the player's Styler by the specified number of energy.
 Icons like this (SPE) increase the player's movement speed.
This mission starts with two nearly identical room layouts. In each, take the first left to grab time powerups, then hug the left wall to the teleporter. Beyond the second room is a multi-chambered area with a northern teleporter and the red teleporter leading to Probopass. Recommended approach: fully explore one side (checking chambers for Bastiodon, target-clearing items past weak Pokémon like Shuckle/Teddiursa, and fleeing any Aggron), then take the north teleporter to grab a speed powerup and a Bastiodon, before returning via the other side: the speed powerup makes this return quick. Loop back through room two to find the last Bastiodon. Finding Delibird along the way nets a nice 20 AP.
Pattern IdentificationIn this Mission, Bastiodon are in different locations depending on the pattern. Additionally, the presence of Delibird depends on the pattern, if the player wishes to use it to grind AP.
Bastiodon, like a boss Pokémon, get agitated at 50% HP. They have the following three attacks:
Aggron have a lot of health, deal a lot of damage, and get agitated at 50% HP, making them very annoying to encounter. Try to avoid them: they aren't worth the 5 AP. They have the following three attacks:
Difficult. Requires avoiding all Aggron and a long-range Poké Assist to handle the electrical attack. A first-try B or C rank is realistic; if not, grind levels on Mission 8 and return. Reaching a reliable A-rank here is a good skill benchmark before moving on, since high-HP bosses continue in the next mission. Note that Probopass has a Rock-type Assist, useful for planning an S-rank attempt.
Hariyama seems tempting due to its Stop effect and heavy damage output, but is a trap here: its long recharge time and inability (without upgrades) to hit Probopass during its electrical attacks make it risky, especially once rock walls are up and close-range options are limited. Piplup remains the strong pick, and its accuracy improves further with leveling. Hitmonlee is a viable Fighting-type alternative once upgraded enough for pseudo-long-range kicks, but Piplup's slowing effect still holds value even against Probopass' modest speed.